'Programming/openGL'에 해당되는 글 90건

  1. 2025.07.30 visual studio 2002 에서 openGL 예제 실행 6
  2. 2025.07.30 openGL light
  3. 2025.07.30 openGL shade 1
  4. 2025.07.29 openGL 은선제거
  5. 2025.07.16 openGL 스터디용 gemini 생성 코드
  6. 2025.04.28 blender in openGL
  7. 2023.08.28 opengl glortho gluperspective
  8. 2022.11.17 glReadPixels() 와 glUseProgram()
  9. 2022.02.08 openCV + openGL
  10. 2020.04.14 glMatrixMode()
Programming/openGL2025. 7. 30. 23:13

맨날 리눅스에서만 하다가 노트북 바꾸기 귀찮아서(!!) 윈도우에서도 해보려고 발악중


일단은 visual studio 에서 콘솔앱으로는 안되서

Windows 데스크탑 애플리케이션으로 프로젝트를 생성


프로젝트 설정에 링커 - 입력 - 추가 종속성에


opengl32.lib 와 glu32.lib를 추가해주면 끝

[링크 : https://makingrobot.tistory.com/155]


F5 눌러서 빌드하니 잘 뜬다.


아래는 gemini가 생성해준 소스코드.

더보기

#include <windows.h> // Win32 API 헤더
#include <gl/gl.h>   // OpenGL 핵심 헤더
#include <gl/glu.h>  // GLU 유틸리티 헤더

// OpenGL 렌더링 컨텍스트 핸들
HGLRC g_hRC = NULL;
// 디바이스 컨텍스트 핸들
HDC g_hDC = NULL;
// 윈도우 핸들
HWND g_hWnd = NULL;
// 인스턴스 핸들
HINSTANCE g_hInstance = NULL;

// 창 클래스 이름 (유니코드 문자열)
LPCWSTR szWindowClass = L"OpenGLWindow";
// 창 제목 (유니코드 문자열)
LPCWSTR szTitle = L"Simple OpenGL Triangle (No GLUT)";

// OpenGL 초기화 함수
void InitOpenGL() {
    // 배경색을 검정색으로 설정 (RGBA 값)
    glClearColor(0.0f, 0.0f, 0.0f, 1.0f);
    // 현재 매트릭스를 프로젝션 매트릭스로 설정
    glMatrixMode(GL_PROJECTION);
    // 2D 직교 투영 설정 (좌표계: x=0.0~200.0, y=0.0~200.0)
    gluOrtho2D(0.0, 200.0, 0.0, 200.0);
}

// 그리기 함수
void DrawScene() {
    // 컬러 버퍼 클리어
    glClear(GL_COLOR_BUFFER_BIT);

    // 삼각형 그리기 시작
    glBegin(GL_TRIANGLES);
    // 첫 번째 꼭지점: 빨간색 (위쪽)
    glColor3f(1.0f, 0.0f, 0.0f);
    glVertex2i(100, 150);
    // 두 번째 꼭지점: 녹색 (왼쪽 아래)
    glColor3f(0.0f, 1.0f, 0.0f);
    glVertex2i(50, 50);
    // 세 번째 꼭지점: 파란색 (오른쪽 아래)
    glColor3f(0.0f, 0.0f, 1.0f);
    glVertex2i(150, 50);
    glEnd(); // 삼각형 그리기 끝

    // 프론트 버퍼와 백 버퍼 교체 (더블 버퍼링 사용 시)
    SwapBuffers(g_hDC);
}

// OpenGL 활성화 함수
// 창 핸들(hWnd), 디바이스 컨텍스트 포인터(hDC), 렌더링 컨텍스트 포인터(hRC)를 인자로 받음
void EnableOpenGL(HWND hWnd, HDC* hDC, HGLRC* hRC) {
    PIXELFORMATDESCRIPTOR pfd;
    int iFormat;

    // 픽셀 형식 기술자 구조체를 0으로 초기화
    ZeroMemory(&pfd, sizeof(pfd));
    // 픽셀 형식 기술자 구조체의 크기 설정
    pfd.nSize = sizeof(pfd);
    // 픽셀 형식 기술자 버전 설정
    pfd.nVersion = 1;
    // 픽셀 형식 플래그 설정: 윈도우에 그리기, OpenGL 지원, 더블 버퍼링 사용
    pfd.dwFlags = PFD_DRAW_TO_WINDOW | PFD_SUPPORT_OPENGL | PFD_DOUBLEBUFFER;
    // 픽셀 타입 설정: RGBA 색상 모드
    pfd.iPixelType = PFD_TYPE_RGBA;
    // 색상 비트 깊이 설정: 32비트 색상
    pfd.cColorBits = 32;
    // 깊이 버퍼 비트 깊이 설정: 16비트 깊이 버퍼
    pfd.cDepthBits = 16;
    // 레이어 타입 설정: 메인 평면
    pfd.iLayerType = PFD_MAIN_PLANE;

    // 윈도우의 디바이스 컨텍스트를 얻음
    *hDC = GetDC(hWnd);

    // 주어진 픽셀 형식 기술자에 가장 적합한 픽셀 형식을 찾음
    iFormat = ChoosePixelFormat(*hDC, &pfd);
    // 디바이스 컨텍스트에 픽셀 형식을 설정
    SetPixelFormat(*hDC, iFormat, &pfd);

    // OpenGL 렌더링 컨텍스트 생성
    *hRC = wglCreateContext(*hDC);
    // 현재 스레드의 디바이스 컨텍스트에 렌더링 컨텍스트를 연결
    wglMakeCurrent(*hDC, *hRC);

    // OpenGL 초기화 함수 호출
    InitOpenGL();
}

// OpenGL 비활성화 함수
// 창 핸들(hWnd), 디바이스 컨텍스트(hDC), 렌더링 컨텍스트(hRC)를 인자로 받음
void DisableOpenGL(HWND hWnd, HDC hDC, HGLRC hRC) {
    // 현재 렌더링 컨텍스트를 해제
    wglMakeCurrent(NULL, NULL);
    // 렌더링 컨텍스트를 삭제
    wglDeleteContext(hRC);
    // 디바이스 컨텍스트를 해제
    ReleaseDC(hWnd, hDC);
}

// 윈도우 프로시저 (메시지 처리 콜백 함수)
// 윈도우 핸들, 메시지 코드, 추가 정보(wParam, lParam)를 인자로 받음
LRESULT CALLBACK WndProc(HWND hWnd, UINT message, WPARAM wParam, LPARAM lParam) {
    switch (message) {
        // 윈도우 생성 시 발생하는 메시지
    case WM_CREATE:
        // OpenGL 활성화 함수 호출
        EnableOpenGL(hWnd, &g_hDC, &g_hRC);
        break;

        // 윈도우가 다시 그려져야 할 때 발생하는 메시지
    case WM_PAINT:
        // 그리기 함수 호출
        DrawScene();
        // WM_PAINT 메시지를 유효화 (반복적인 WM_PAINT 메시지 방지)
        ValidateRect(hWnd, NULL);
        break;

        // 윈도우 크기 변경 시 발생하는 메시지
    case WM_SIZE:
        // 뷰포트 크기를 윈도우 크기에 맞게 조정 (선택 사항)
        // L_PARAM에서 새 너비와 높이를 추출하여 glViewport 함수에 전달
        // glViewport(0, 0, LOWORD(lParam), HIWORD(lParam));
        break;

        // 윈도우 닫기 버튼 클릭 시 발생하는 메시지
    case WM_CLOSE:
        // 윈도우 파괴 메시지를 보냄
        DestroyWindow(hWnd);
        break;

        // 윈도우가 파괴될 때 발생하는 메시지
    case WM_DESTROY:
        // OpenGL 비활성화 함수 호출
        DisableOpenGL(hWnd, g_hDC, g_hRC);
        // 메시지 루프를 종료하는 메시지를 보냄
        PostQuitMessage(0);
        break;

        // 처리하지 않는 다른 메시지들은 기본 윈도우 프로시저로 전달
    default:
        return DefWindowProc(hWnd, message, wParam, lParam);
    }
    return 0;
}

// WinMain 함수 (Windows 애플리케이션의 진입점)
// 인스턴스 핸들, 이전 인스턴스 핸들, 명령줄 문자열, 표시 상태 플래그를 인자로 받음
int WINAPI WinMain(HINSTANCE hInstance, HINSTANCE hPrevInstance, LPSTR lpCmdLine, int nCmdShow) {
    WNDCLASS wc; // 윈도우 클래스 구조체
    MSG msg;     // 메시지 구조체
    BOOL bDone = FALSE; // 메시지 루프 종료 플래그

    g_hInstance = hInstance; // 현재 인스턴스 핸들 저장

    // 윈도우 클래스 스타일 설정: 고유한 DC, 수평/수직 리드로우 시 다시 그리기
    wc.style = CS_OWNDC | CS_HREDRAW | CS_VREDRAW;
    // 윈도우 프로시저 함수 포인터 설정
    wc.lpfnWndProc = WndProc;
    // 추가 클래스 메모리 (0)
    wc.cbClsExtra = 0;
    // 추가 윈도우 메모리 (0)
    wc.cbWndExtra = 0;
    // 인스턴스 핸들 설정
    wc.hInstance = hInstance;
    // 아이콘 설정 (기본 애플리케이션 아이콘)
    wc.hIcon = LoadIcon(NULL, IDI_APPLICATION);
    // 커서 설정 (기본 화살표 커서)
    wc.hCursor = LoadCursor(NULL, IDC_ARROW);
    // 배경 브러시 설정 (검정색 솔리드 브러시)
    wc.hbrBackground = (HBRUSH)GetStockObject(BLACK_BRUSH);
    // 메뉴 이름 (없음)
    wc.lpszMenuName = NULL;
    // 윈도우 클래스 이름 설정 (LPCWSTR)
    wc.lpszClassName = szWindowClass;

    // 윈도우 클래스 등록 시도
    if (!RegisterClass(&wc)) {
        // 등록 실패 시 메시지 박스 표시 (유니코드 문자열 사용)
        MessageBox(NULL, L"Window Registration Failed!", L"Error", MB_ICONEXCLAMATION | MB_OK);
        return 0; // 프로그램 종료
    }

    // 윈도우 생성 시도
    g_hWnd = CreateWindowEx(
        WS_EX_APPWINDOW, // 확장된 윈도우 스타일: 작업 표시줄에 앱으로 표시
        szWindowClass,   // 윈도우 클래스 이름 (LPCWSTR)
        szTitle,         // 윈도우 제목 (LPCWSTR)
        // 윈도우 스타일: 오버랩된 창, 형제 윈도우 영역 클리핑, 자식 윈도우 영역 클리핑
        WS_OVERLAPPEDWINDOW | WS_CLIPSIBLINGS | WS_CLIPCHILDREN,
        CW_USEDEFAULT, CW_USEDEFAULT, // x, y 위치 (기본값 사용)
        400, 400, // 윈도우 너비, 높이
        NULL,    // 부모 윈도우 핸들 (없음)
        NULL,    // 메뉴 핸들 (없음)
        hInstance, // 인스턴스 핸들
        NULL     // 추가 생성 데이터 (없음)
    );

    // 윈도우 생성 실패 시
    if (!g_hWnd) {
        // 메시지 박스 표시 (유니코드 문자열 사용)
        MessageBox(NULL, L"Window Creation Failed!", L"Error", MB_ICONEXCLAMATION | MB_OK);
        return 0; // 프로그램 종료
    }

    // 윈도우를 화면에 표시
    ShowWindow(g_hWnd, nCmdShow);
    // 윈도우를 업데이트하여 WM_PAINT 메시지 발생
    UpdateWindow(g_hWnd);

    // 메시지 루프
    while (!bDone) {
        // 메시지 큐에서 메시지를 확인 (메시지가 없어도 즉시 반환)
        if (PeekMessage(&msg, NULL, 0, 0, PM_REMOVE)) {
            // 종료 메시지 (WM_QUIT) 수신 시
            if (msg.message == WM_QUIT) {
                bDone = TRUE; // 루프 종료 플래그 설정
            }
            else {
                // 키보드 메시지를 번역 (예: VK_SHIFT -> WM_KEYDOWN)
                TranslateMessage(&msg);
                // 메시지를 해당 윈도우의 윈도우 프로시저로 디스패치
                DispatchMessage(&msg);
            }
        }
        else {
            // 메시지가 없을 때 지속적으로 그리기 (게임 루프와 유사)
            DrawScene();
        }
    }

    // 프로그램 종료 코드 반환
    return (int)msg.wParam;
}

'Programming > openGL' 카테고리의 다른 글

openGL light  (0) 2025.07.30
openGL shade  (1) 2025.07.30
openGL 은선제거  (0) 2025.07.29
openGL 스터디용 gemini 생성 코드  (0) 2025.07.16
blender in openGL  (0) 2025.04.28
Posted by 구차니
Programming/openGL2025. 7. 30. 19:33

양면을 모두 조명처리하도록 설정하려면 아래의 명령을 쓰면 된다고 한다.

폴리곤을 줄이기 위해서 두께가 없는 면으로 구성된 녀석을 광원을 주려면 이렇게 해야만 culling 에서 문제가 안되려나?

glLightModeli(GL_LIGHT_MODEL_TWO_SIDED, GL_TRUE);

[링크 : https://wjdgh283.tistory.com/m/entry/OpenGL로-배우는-컴퓨터-그래픽스-Chapter-03-그래픽-컬러처리-1]


광원을 켜면 glColor로 설정한 건 무시된다고.

그래서 glMaterialfv()로 값을 설정해야 한다고 하는데, 광원의 종류를 객체별로 지정해주는 건가?

glMaterialfv( GL_FRONT, GL_AMBIENT_AND_DIFFUSE, materialAmbient );
glMaterialfv( GL_FORNT, GL_SPECULAR, materialSpecular );
glMaterialf( GL_FRONT, GL_SHININESS, 60.0f );

[링크 : https://sungcheol-kim.gitbook.io/opengl-tutorial/chapter10]

'Programming > openGL' 카테고리의 다른 글

visual studio 2002 에서 openGL 예제 실행  (6) 2025.07.30
openGL shade  (1) 2025.07.30
openGL 은선제거  (0) 2025.07.29
openGL 스터디용 gemini 생성 코드  (0) 2025.07.16
blender in openGL  (0) 2025.04.28
Posted by 구차니
Programming/openGL2025. 7. 30. 19:27

opengl에서 지원하는 쉐이드(면 색상 칠하기)는 flat과 gouraud 뿐이라는데

한 20년 전에 퐁은 어떻게 한거였지?


I digged around a bit. You can use the fixed function pipeline and set glLightModeli(GL_LIGHT_MODEL_TWO_SIDE, 1); GL will then light backfaces with your back material and reversed normals. 

[링크 : https://gamedev.stackexchange.com/questions/9228/double-sides-face-with-two-normals]


flat / Gouraud

[링크 : https://gofo-coding.tistory.com/entry/OpenGL-Lighting-Shading]


phong은 쉐이더 써야한다고

[링크 : https://dev-sbee.tistory.com/35]


'Programming > openGL' 카테고리의 다른 글

visual studio 2002 에서 openGL 예제 실행  (6) 2025.07.30
openGL light  (0) 2025.07.30
openGL 은선제거  (0) 2025.07.29
openGL 스터디용 gemini 생성 코드  (0) 2025.07.16
blender in openGL  (0) 2025.04.28
Posted by 구차니
Programming/openGL2025. 7. 29. 18:14

숨겨진 선이나 면을 제거하는 건데

폴리곤의 방향에 따라서 해당 면을 앞면으로 판단해 렌더하냐 안하냐를 설정해 주어야 한다.

그런데 폴리곤의 normal vector를 이용해 cpu로 처리하는거 보다 이렇게 gpu에서 처리하도록 구현되어 있...겠지?


glEnable(GL_CULL_FACE);
glFrontFace(GL_CW);
glCullFace(GL_BACK);

glEnable(GL_DEPTH_TEST);

[링크 : https://blog.naver.com/thooy/10097790648]


Name
glCullFace — specify whether front- or back-facing polygons can be culled

C Specification
void glCullFace( GLenum mode);
 
Parameters
mode
Specifies whether front- or back-facing polygons are candidates for culling. Symbolic constants GL_FRONT, GL_BACK, and GL_FRONT_AND_BACK are accepted. The initial value is GL_BACK.

[링크 : https://registry.khronos.org/OpenGL-Refpages/es2.0/xhtml/glCullFace.xml]


은선 제거 기법에는 다음과 같은 기법들이 있다.


. 최대 최소법에 의한 은선 처리
. 법선 벡터법에 의한 은선 처리
. 능선 탐색법에 의한 은선 처리
. 공간 접근
. 객체 공간 알고리즘
. 리스트 순위 알고리즘
. 이미지 공간 알고리즘
. 워노크 알고리즘
. 프랭크린 알고리즘
. 웨일러-아델톤 알고리즘

[링크 : https://blog.naver.com/hwa7132/100096580196]

[링크 : https://learnopengl.com/Advanced-OpenGL/Face-culling]

[링크 : https://funnypr.tistory.com/m/entry/OpenGL-Normal-Vector]

[링크 : https://usingsystem.tistory.com/m/487]

[링크 : https://www.gamedev.net/forums/topic/620304-opengl-frustum-culling-with-glrotatef/]


'Programming > openGL' 카테고리의 다른 글

openGL light  (0) 2025.07.30
openGL shade  (1) 2025.07.30
openGL 스터디용 gemini 생성 코드  (0) 2025.07.16
blender in openGL  (0) 2025.04.28
opengl glortho gluperspective  (0) 2023.08.28
Posted by 구차니
Programming/openGL2025. 7. 16. 16:54

몇년에 걸쳐서 막혔던게 이렇게 쉽게 몇번의 피드백으로 주어지다니..

공부가 의미없는 시대인가.. (현타)


curl -O https://raw.githubusercontent.com/nothings/stb/master/stb_image.h
wget https://m.health.chosun.com/site/data/img_dir/2025/04/08/2025040803041_0.jpg
mv 2025040803041_0.jpg dog.jpg


#include <GL/glut.h>
#include <math.h>
#include <stdio.h>

#define STB_IMAGE_IMPLEMENTATION
#include "stb_image.h"

// 창 크기
int width = 800;
int height = 600;

// 카메라 변수
float cam_pos_x = 5.0f, cam_pos_y = 4.0f, cam_pos_z = 5.0f;
float cam_yaw = -135.0f; // Y축 기준 회전 (좌/우)
float cam_pitch = -30.0f;  // X축 기준 회전 (상/하)
float fov = 45.0f; // 시야각 (줌인/아웃용)

// 마우스 상태 변수
int last_mouse_x, last_mouse_y;
int is_panning = 0; // 휠 드래그(패닝) 상태
int is_rotating = 0; // 좌클릭 드래그(회전) 상태

// 객체 회전 변수
float obj_rot_x = 0.0f;
float obj_rot_y = 0.0f;

// 클리핑 평면 변수
float near_plane = 1.0f;
float far_plane = 100.0f;

// 텍스처 변수
GLuint texture_id;
int texture_enabled = 1; // 텍스처 활성화 상태

// 카메라 방향 벡터 계산
void update_camera_vectors(float* front_x, float* front_z, float* up_x, float* up_y, float* up_z, float* right_x, float* right_z) {
	float yaw_rad = cam_yaw * M_PI / 180.0f;
	float pitch_rad = cam_pitch * M_PI / 180.0f;

	// 시점 방향 벡터
	*front_x = cos(yaw_rad) * cos(pitch_rad);
	*front_z = sin(yaw_rad) * cos(pitch_rad);
	
	// 오른쪽 벡터 (패닝에 사용)
	*right_x = cos(yaw_rad - M_PI / 2.0f);
	*right_z = sin(yaw_rad - M_PI / 2.0f);

	// 위쪽 벡터 (패닝에 사용)
	// 간단한 구현을 위해 Y축 고정
	*up_x = 0.0f;
	*up_y = 1.0f;
	*up_z = 0.0f;
}

void draw_scene() {
	glPushMatrix();
	glRotatef(obj_rot_x, 1.0f, 0.0f, 0.0f); // X축 회전
	glRotatef(obj_rot_y, 0.0f, 1.0f, 0.0f); // Y축 회전

	// 뚫린 상자 그리기 (6개의 면을 각각 그림)
	float thickness = 0.1f;

	// 앞면 (빨강)
	glPushMatrix();
	glColor3f(1.0, 0.0, 0.0);
	glTranslatef(0, 0, 1.5f);
	glScalef(3.0f, 3.0f, thickness);
	glutSolidCube(1.0);
	glPopMatrix();

	// 뒷면 (초록)
	glPushMatrix();
	glColor3f(0.0, 1.0, 0.0);
	glRotatef(180, 0, 1, 0);
	glTranslatef(0, 0, 1.5f);
	glScalef(3.0f, 3.0f, thickness);
	glutSolidCube(1.0);
	glPopMatrix();

	// 왼쪽 (파랑)
	glPushMatrix();
	glColor3f(0.0, 0.0, 1.0);
	glRotatef(-90, 0, 1, 0);
	glTranslatef(0, 0, 1.5f);
	glScalef(3.0f, 3.0f, thickness);
	glutSolidCube(1.0);
	glPopMatrix();

	// 오른쪽 (노랑)
	glPushMatrix();
	glColor3f(1.0, 1.0, 0.0);
	glRotatef(90, 0, 1, 0);
	glTranslatef(0, 0, 1.5f);
	glScalef(3.0f, 3.0f, thickness);
	glutSolidCube(1.0);
	glPopMatrix();

	// 윗면 (마젠타)
	glPushMatrix();
	glColor3f(1.0, 0.0, 1.0);
	glRotatef(90, 1, 0, 0);
	glTranslatef(0, 0, 1.5f);
	glScalef(3.0f, thickness, 3.0f - thickness*2);
	glutSolidCube(1.0);
	glPopMatrix();

	// 아랫면 (시안)
	glPushMatrix();
	glColor3f(0.0, 1.0, 1.0);
	glRotatef(-90, 1, 0, 0);
	glTranslatef(0, 0, 1.5f);
	glScalef(3.0f, thickness, 3.0f - thickness*2);
	glutSolidCube(1.0);
	glPopMatrix();


	// 텍스처가 입혀진 원통 그리기
	if (texture_enabled) {
		glEnable(GL_TEXTURE_2D);
		glBindTexture(GL_TEXTURE_2D, texture_id);
	}

	glColor3f(1.0, 1.0, 1.0); // 텍스처와 곱해질 색상
	GLUquadric* quad = gluNewQuadric();
	gluQuadricTexture(quad, GL_TRUE);
	gluCylinder(quad, 0.5, 0.5, 2.0, 32, 32);
	gluDeleteQuadric(quad);

	if (texture_enabled) {
		glDisable(GL_TEXTURE_2D);
	}

	glPopMatrix();
}

// 텍스트 렌더링 함수
void render_text(int x, int y, const char* string) {
	glRasterPos2f(x, y);
	for (const char* c = string; *c != '\0'; c++) {
		glutBitmapCharacter(GLUT_BITMAP_HELVETICA_12, *c);
	}
}

// 행렬 정보 출력 함수
void draw_matrix_info() {
	GLfloat modelview[16];
	GLfloat projection[16];
	GLfloat rotation[16];
	char buffer[128];

	glGetFloatv(GL_MODELVIEW_MATRIX, modelview);
	glGetFloatv(GL_PROJECTION_MATRIX, projection);

	// 회전 행렬 계산
	glMatrixMode(GL_MODELVIEW);
	glPushMatrix();
	glLoadIdentity();
	glRotatef(obj_rot_x, 1.0f, 0.0f, 0.0f);
	glRotatef(obj_rot_y, 0.0f, 1.0f, 0.0f);
	glGetFloatv(GL_MODELVIEW_MATRIX, rotation);
	glPopMatrix();

	glColor3f(1.0, 1.0, 1.0); // 흰색으로 설정

	// 2D 렌더링을 위해 투영 행렬 변경
	glMatrixMode(GL_PROJECTION);
	glPushMatrix();
	glLoadIdentity();
	gluOrtho2D(0, width, 0, height);

	glMatrixMode(GL_MODELVIEW);
	glPushMatrix();
	glLoadIdentity();

	// Model-View Matrix 정보 출력
	sprintf(buffer, "Model-View Matrix:");
	render_text(10, height - 20, buffer);
	for (int i = 0; i < 4; i++) {
		sprintf(buffer, "%.2f %.2f %.2f %.2f", modelview[i*4], modelview[i*4+1], modelview[i*4+2], modelview[i*4+3]);
		render_text(10, height - 35 - (i * 15), buffer);
	}

	// Projection Matrix 정보 출력
	sprintf(buffer, "Projection Matrix:");
	render_text(10, height - 100, buffer);
	for (int i = 0; i < 4; i++) {
		sprintf(buffer, "%.2f %.2f %.2f %.2f", projection[i*4], projection[i*4+1], projection[i*4+2], projection[i*4+3]);
		render_text(10, height - 115 - (i * 15), buffer);
	}

	// Rotation Matrix 정보 출력
	sprintf(buffer, "Rotation Matrix:");
	render_text(10, height - 180, buffer);
	for (int i = 0; i < 4; i++) {
		sprintf(buffer, "%.2f %.2f %.2f %.2f", rotation[i*4], rotation[i*4+1], rotation[i*4+2], rotation[i*4+3]);
		render_text(10, height - 195 - (i * 15), buffer);
	}

	// Near/Far 정보 출력
	sprintf(buffer, "Near: %.2f, Far: %.2f", near_plane, far_plane);
	render_text(10, height - 260, buffer);

	// 원래의 투영, 모델뷰 행렬로 복원
	glMatrixMode(GL_PROJECTION);
	glPopMatrix();
	glMatrixMode(GL_MODELVIEW);
	glPopMatrix();
}

void display() {
	glClear(GL_COLOR_BUFFER_BIT | GL_DEPTH_BUFFER_BIT);

	float yaw_rad = cam_yaw * M_PI / 180.0f;
	float pitch_rad = cam_pitch * M_PI / 180.0f;
	float eye_separation = 0.5f; // 눈 사이 간격

	// 오른쪽 벡터 계산
	float right_x = cos(yaw_rad - M_PI / 2.0f);
	float right_z = sin(yaw_rad - M_PI / 2.0f);

	// 왼쪽 눈 렌더링
	glViewport(0, 0, width / 2, height);
	glMatrixMode(GL_PROJECTION);
	glLoadIdentity();
	gluPerspective(fov, (double)(width/2) / (double)height, near_plane, far_plane);
	glMatrixMode(GL_MODELVIEW);
	glLoadIdentity();

	float left_cam_x = cam_pos_x - right_x * eye_separation / 2.0f;
	float left_cam_z = cam_pos_z - right_z * eye_separation / 2.0f;
	float look_at_x = left_cam_x + cos(yaw_rad) * cos(pitch_rad);
	float look_at_y = cam_pos_y + sin(pitch_rad);
	float look_at_z = left_cam_z + sin(yaw_rad) * cos(pitch_rad);
	gluLookAt(left_cam_x, cam_pos_y, left_cam_z, look_at_x, look_at_y, look_at_z, 0.0, 1.0, 0.0);
	draw_scene();
	draw_matrix_info();

	// 오른쪽 눈 렌더링
	glViewport(width / 2, 0, width / 2, height);
	glMatrixMode(GL_PROJECTION);
	glLoadIdentity();
	gluPerspective(fov, (double)(width/2) / (double)height, near_plane, far_plane);
	glMatrixMode(GL_MODELVIEW);
	glLoadIdentity();

	float right_cam_x = cam_pos_x + right_x * eye_separation / 2.0f;
	float right_cam_z = cam_pos_z + right_z * eye_separation / 2.0f;
	look_at_x = right_cam_x + cos(yaw_rad) * cos(pitch_rad);
	look_at_y = cam_pos_y + sin(pitch_rad);
	look_at_z = right_cam_z + sin(yaw_rad) * cos(pitch_rad);
	gluLookAt(right_cam_x, cam_pos_y, right_cam_z, look_at_x, look_at_y, look_at_z, 0.0, 1.0, 0.0);
	draw_scene();
	draw_matrix_info();

	glutSwapBuffers();
}

void reshape(int w, int h) {
	width = w;
	h = h > 0 ? h : 1;
	glViewport(0, 0, width, height);

	glMatrixMode(GL_PROJECTION);
	glLoadIdentity();
	gluPerspective(fov, (double)width / (double)height, 1.0, 100.0);
}

void keyboard(unsigned char key, int x, int y) {
	float speed = 0.1f;
	float yaw_rad = cam_yaw * M_PI / 180.0f;

	switch (key) {
		case 'w':
			cam_pos_x += cos(yaw_rad) * speed;
			cam_pos_z += sin(yaw_rad) * speed;
			break;
		case 's':
			cam_pos_x -= cos(yaw_rad) * speed;
			cam_pos_z -= sin(yaw_rad) * speed;
			break;
		case 'a':
			cam_pos_x += cos(yaw_rad - M_PI / 2.0f) * speed;
			cam_pos_z += sin(yaw_rad - M_PI / 2.0f) * speed;
			break;
		case 'd':
			cam_pos_x -= cos(yaw_rad - M_PI / 2.0f) * speed;
			cam_pos_z -= sin(yaw_rad - M_PI / 2.0f) * speed;
			break;
		case 'r': // 리셋 기능
			cam_pos_x = 5.0f; cam_pos_y = 4.0f; cam_pos_z = 5.0f;
			cam_yaw = -135.0f;
			cam_pitch = -30.0f;
			fov = 45.0f;
			obj_rot_x = 0.0f;
			obj_rot_y = 0.0f;
			near_plane = 1.0f;
			far_plane = 100.0f;
			reshape(width, height);
			break;
		case 'i': // near 증가
			near_plane += 0.1f;
			break;
		case 'k': // near 감소
			near_plane -= 0.1f;
			if (near_plane < 0.1f) near_plane = 0.1f; // 0보다 작아지지 않도록
			break;
		case 'o': // far 증가
			far_plane += 0.1f;
			break;
		case 'l': // far 감소
			far_plane -= 0.1f;
			if (far_plane < near_plane) far_plane = near_plane + 0.1f; // near보다 작아지지 않도록
			break;
		case 't': // 텍스처 토글
			texture_enabled = !texture_enabled;
			break;
	}
	glutPostRedisplay();
}

void specialKeys(int key, int x, int y) {
	float rot_speed = 5.0f;
	switch (key) {
		case GLUT_KEY_UP:
			obj_rot_x -= rot_speed;
			break;
		case GLUT_KEY_DOWN:
			obj_rot_x += rot_speed;
			break;
		case GLUT_KEY_LEFT:
			obj_rot_y -= rot_speed;
			break;
		case GLUT_KEY_RIGHT:
			obj_rot_y += rot_speed;
			break;
	}
	glutPostRedisplay();
}

void mouse(int button, int state, int x, int y) {
	// 휠 줌 인/아웃
	if (button == 3) { // 휠 업
		fov -= 1.0f;
		if (fov < 1.0f) fov = 1.0f;
		reshape(width, height); // 투영 행렬 업데이트
	} else if (button == 4) { // 휠 다운
		fov += 1.0f;
		if (fov > 90.0f) fov = 90.0f;
		reshape(width, height); // 투영 행렬 업데이트
	}

	// 휠 클릭 (패닝)
	if (button == GLUT_MIDDLE_BUTTON) {
		if (state == GLUT_DOWN) {
			is_panning = 1;
			last_mouse_x = x;
			last_mouse_y = y;
		} else {
			is_panning = 0;
		}
	}
	
	// 좌클릭 (회전)
	if (button == GLUT_LEFT_BUTTON) {
		if (state == GLUT_DOWN) {
			is_rotating = 1;
			last_mouse_x = x;
			last_mouse_y = y;
		} else {
			is_rotating = 0;
		}
	}
	glutPostRedisplay();
}

void motion(int x, int y) {
	int dx = x - last_mouse_x;
	int dy = y - last_mouse_y;
	last_mouse_x = x;
	last_mouse_y = y;

	if (is_panning) {
		float pan_speed = 0.01f;
		float front_x, front_z, up_x, up_y, up_z, right_x, right_z;
		update_camera_vectors(&front_x, &front_z, &up_x, &up_y, &up_z, &right_x, &right_z);

		cam_pos_x -= right_x * dx * pan_speed;
		cam_pos_z -= right_z * dx * pan_speed;
		cam_pos_y += dy * pan_speed; // Y축 방향으로 이동
	} else if (is_rotating) {
		float rot_speed = 0.5f;
		obj_rot_y += dx * rot_speed;
		obj_rot_x += dy * rot_speed;
	}
	glutPostRedisplay();
}


void init() {
	glClearColor(0.1, 0.1, 0.1, 1.0);
	glEnable(GL_DEPTH_TEST);
}

// 텍스처 로드 함수
void load_texture(const char* filename) {
	int width, height, nrChannels;
	unsigned char *data = stbi_load(filename, &width, &height, &nrChannels, 0);
	if (data) {
		glGenTextures(1, &texture_id);
		glBindTexture(GL_TEXTURE_2D, texture_id);

		glTexParameteri(GL_TEXTURE_2D, GL_TEXTURE_WRAP_S, GL_REPEAT);
		glTexParameteri(GL_TEXTURE_2D, GL_TEXTURE_WRAP_T, GL_REPEAT);
		glTexParameteri(GL_TEXTURE_2D, GL_TEXTURE_MIN_FILTER, GL_LINEAR);
		glTexParameteri(GL_TEXTURE_2D, GL_TEXTURE_MAG_FILTER, GL_LINEAR);

		GLenum format = (nrChannels == 4) ? GL_RGBA : GL_RGB;
		glTexImage2D(GL_TEXTURE_2D, 0, format, width, height, 0, format, GL_UNSIGNED_BYTE, data);
		stbi_image_free(data);
	} else {
		printf("Failed to load texture: %s\n", filename);
		stbi_image_free(data);
	}
}

void print_help() {
	printf("====== Key Controls ======\n");
	printf(" w, a, s, d : Move Camera\n");
	printf(" Arrow Keys : Rotate Object\n");
	printf(" i, k       : Adjust Near Plane\n");
	printf(" o, l       : Adjust Far Plane\n");
	printf(" r          : Reset Camera and Object\n");
	printf(" t          : Toggle Texture\n");
	printf("--------------------------\n");
	printf("====== Mouse Controls ======\n");
	printf(" Left Drag  : Rotate Object\n");
	printf(" Wheel Drag : Pan Camera\n");
	printf(" Wheel Scroll: Zoom (Adjust FOV)\n");
	printf("==========================\n");
}

int main(int argc, char** argv) {
	print_help();
	glutInit(&argc, argv);
	glutInitDisplayMode(GLUT_DOUBLE | GLUT_RGBA | GLUT_DEPTH);
	glutInitWindowSize(width, height);
	glutCreateWindow("OpenGL Camera Control Demo");

	glutDisplayFunc(display);
	glutReshapeFunc(reshape);
	glutKeyboardFunc(keyboard);
	glutSpecialFunc(specialKeys);
	glutMouseFunc(mouse);
	glutMotionFunc(motion); // 마우스 버튼이 눌린 상태에서의 움직임

	init();
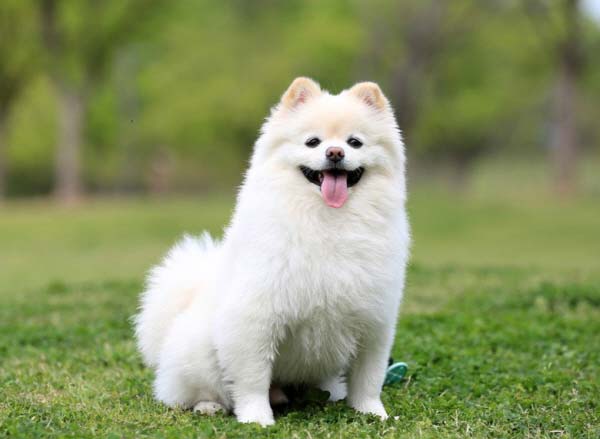
	load_texture("dog.jpg"); // 텍스처 로드
	glutMainLoop();

	return 0;
}

'Programming > openGL' 카테고리의 다른 글

openGL shade  (1) 2025.07.30
openGL 은선제거  (0) 2025.07.29
blender in openGL  (0) 2025.04.28
opengl glortho gluperspective  (0) 2023.08.28
glReadPixels() 와 glUseProgram()  (0) 2022.11.17
Posted by 구차니
Programming/openGL2025. 4. 28. 19:06

Open Asset Import Library(assimp) 를 이용해서 blender를 읽어오고 openGL로 그릴수 있는 것으로 보인다.


Features

  • Reads more than 30 3D file formats, including Collada, X, 3DS, Blend, Obj
  • Converts them to a hierarchical in-memory data structure
  • Provides 'post-processing steps' to improve the input data, i.e. generate normals and tangents or fix import issues.
  • Provides APIs for both C and C++
  • Imports skeleton animations and skinning weights
  • Supports complex multi-layer materials
  • www.open3mod.com/ is an Open-Source viewer that is based off assimp to view models (Windows only)

[링크 : https://sourceforge.net/projects/assimp/]


Assimp::Importer importer;
const aiScene *scene = importer.ReadFile(filename,aiProcessPreset_TargetRealtime_Fast);
aiMesh *mesh = scene->mMeshes[0]; //assuming you only want the first mesh

float *vertexArray;
float *normalArray;
float *uvArray;

int numVerts;
next extract the data

numVerts = mesh->mNumFaces*3;

vertexArray = new float[mesh->mNumFaces*3*3];
normalArray = new float[mesh->mNumFaces*3*3];
uvArray = new float[mesh->mNumFaces*3*2];

for(unsigned int i=0;i<mesh->mNumFaces;i++)
{
    const aiFace& face = mesh->mFaces[i];

    for(int j=0;j<3;j++)
    {
        aiVector3D uv = mesh->mTextureCoords[0][face.mIndices[j]];
        memcpy(uvArray,&uv,sizeof(float)*2);
        uvArray+=2;

        aiVector3D normal = mesh->mNormals[face.mIndices[j]];
        memcpy(normalArray,&normal,sizeof(float)*3);
        normalArray+=3;

        aiVector3D pos = mesh->mVertices[face.mIndices[j]];
        memcpy(vertexArray,&pos,sizeof(float)*3);
        vertexArray+=3;
    }
}

uvArray-=mesh->mNumFaces*3*2;
normalArray-=mesh->mNumFaces*3*3;
vertexArray-=mesh->mNumFaces*3*3;

[링크 : https://nickthecoder.wordpress.com/2013/01/20/mesh-loading-with-assimp/]

    [링크 : https://stackoverflow.com/questions/35111681/make-a-model-in-blender-and-load-in-opengl]


'Programming > openGL' 카테고리의 다른 글

openGL 은선제거  (0) 2025.07.29
openGL 스터디용 gemini 생성 코드  (0) 2025.07.16
opengl glortho gluperspective  (0) 2023.08.28
glReadPixels() 와 glUseProgram()  (0) 2022.11.17
openCV + openGL  (0) 2022.02.08
Posted by 구차니
Programming/openGL2023. 8. 28. 19:28

orthogonal(직교)

perspective(원근)


-1.0 ~ 1.0 사이로 정규화 해야 한다는데, 그래서 이전에 막 잘리고 난리였던 듯..

[링크 : https://www.scratchapixel.com/lessons/3d-basic-rendering/perspective-and-orthographic-projection-matrix/orthographic-projection-matrix.html]

[링크 : https://heinleinsgame.tistory.com/m/11]


'Programming > openGL' 카테고리의 다른 글

openGL 스터디용 gemini 생성 코드  (0) 2025.07.16
blender in openGL  (0) 2025.04.28
glReadPixels() 와 glUseProgram()  (0) 2022.11.17
openCV + openGL  (0) 2022.02.08
glMatrixMode()  (0) 2020.04.14
Posted by 구차니
Programming/openGL2022. 11. 17. 17:49

wayland / weston 에서 glReadPixels를 통해 읽어 오는게 실패해서 찾아보니

glUserProgram()을 하면 된다는데.. 문제는 어떤 컨텍스트의 정보를 어떻게 받아오냐 일 듯..


glPixelStorei(GL_PACK_ALIGNMENT, 1);
glReadPixels(0, 0, output->width, output->height, GL_RGBA, GL_UNSIGNED_BYTE, data);

[링크 : https://github.com/ereslibre/wayland/blob/master/compositor/screenshooter.c]


It's an error to call anything but a very limited set of functions between glBegin and glEnd. That list is mostly composed of functions related to specifying attributes of a vertex (e.g., glVertex, glNormal, glColor, glTexCoord, etc.).

So, if your OpenGL implementation is following the OpenGL specification, glReadPixels should return immediately without executing because of being called within a glBegin/glEnd group. Remove those from around your calls, and glReadPixels should work as expected.

[링크 : https://stackoverflow.com/questions/19351568/glreadpixels-doesnt-work]


I figured it out. All I had to do was add glUseProgram(0) at the very end of the draw cylinder function. After more than 3 weeks of looking into this.

[링크 : https://computergraphics.stackexchange.com/questions/8354/why-is-glreadpixels-only-working-in-certain-cases]


glUseProgram — Installs a program object as part of current rendering state

[링크 : https://registry.khronos.org/OpenGL-Refpages/gl4/html/glUseProgram.xhtml]

[링크 : https://stackoverflow.com/questions/13546461/what-does-gluseprogram0-do]

'Programming > openGL' 카테고리의 다른 글

blender in openGL  (0) 2025.04.28
opengl glortho gluperspective  (0) 2023.08.28
openCV + openGL  (0) 2022.02.08
glMatrixMode()  (0) 2020.04.14
opengl superbible 3rd 리눅스 빌드 패키지  (0) 2020.04.08
Posted by 구차니
Programming/openGL2022. 2. 8. 12:47

mat 변수가 나오는걸 봐서는 구버전이라.. 요즘꺼에 돌려보려면 조금 고생할 듯.

openGL은 텍스쳐까진 보질 못해서 코드를 이해 못하겠네..


[링크 : https://webnautes.tistory.com/1098]

'Programming > openGL' 카테고리의 다른 글

opengl glortho gluperspective  (0) 2023.08.28
glReadPixels() 와 glUseProgram()  (0) 2022.11.17
glMatrixMode()  (0) 2020.04.14
opengl superbible 3rd 리눅스 빌드 패키지  (0) 2020.04.08
opengl super bible 3rd - 4,5 chapter  (0) 2020.04.06
Posted by 구차니
Programming/openGL2020. 4. 14. 21:49

GL_MODELVIEW와 GL_PROJECTION만 예제로 많이 보았는데

GL_COLOR와 GL_TEXTURE도 가능한 옵션(?)이다.


void glMatrixMode(GLenum mode);

GL_MODELVIEW
Applies subsequent matrix operations to the modelview matrix stack.

GL_PROJECTION
Applies subsequent matrix operations to the projection matrix stack.

GL_TEXTURE
Applies subsequent matrix operations to the texture matrix stack.

GL_COLOR
Applies subsequent matrix operations to the color matrix stack.

[링크 : https://www.khronos.org/registry/OpenGL-Refpages/gl2.1/xhtml/glMatrixMode.xml]

'Programming > openGL' 카테고리의 다른 글

glReadPixels() 와 glUseProgram()  (0) 2022.11.17
openCV + openGL  (0) 2022.02.08
opengl superbible 3rd 리눅스 빌드 패키지  (0) 2020.04.08
opengl super bible 3rd - 4,5 chapter  (0) 2020.04.06
openGL 책 보면서 정리중 - 챕터3  (0) 2020.04.05
Posted by 구차니