#include <LiquidCrystal.h>
#include <Servo.h>
// initialize the library with the numbers of the interface pins
LiquidCrystal lcd(12, 11, 5, 4, 3, 2);
int potpin = 0;
int raw;
int val;
Servo myservo;
void setup() {
myservo.attach(9);
// set up the LCD's number of columns and rows:
lcd.begin(16, 2);
// Print a message to the LCD.
lcd.leftToRight();
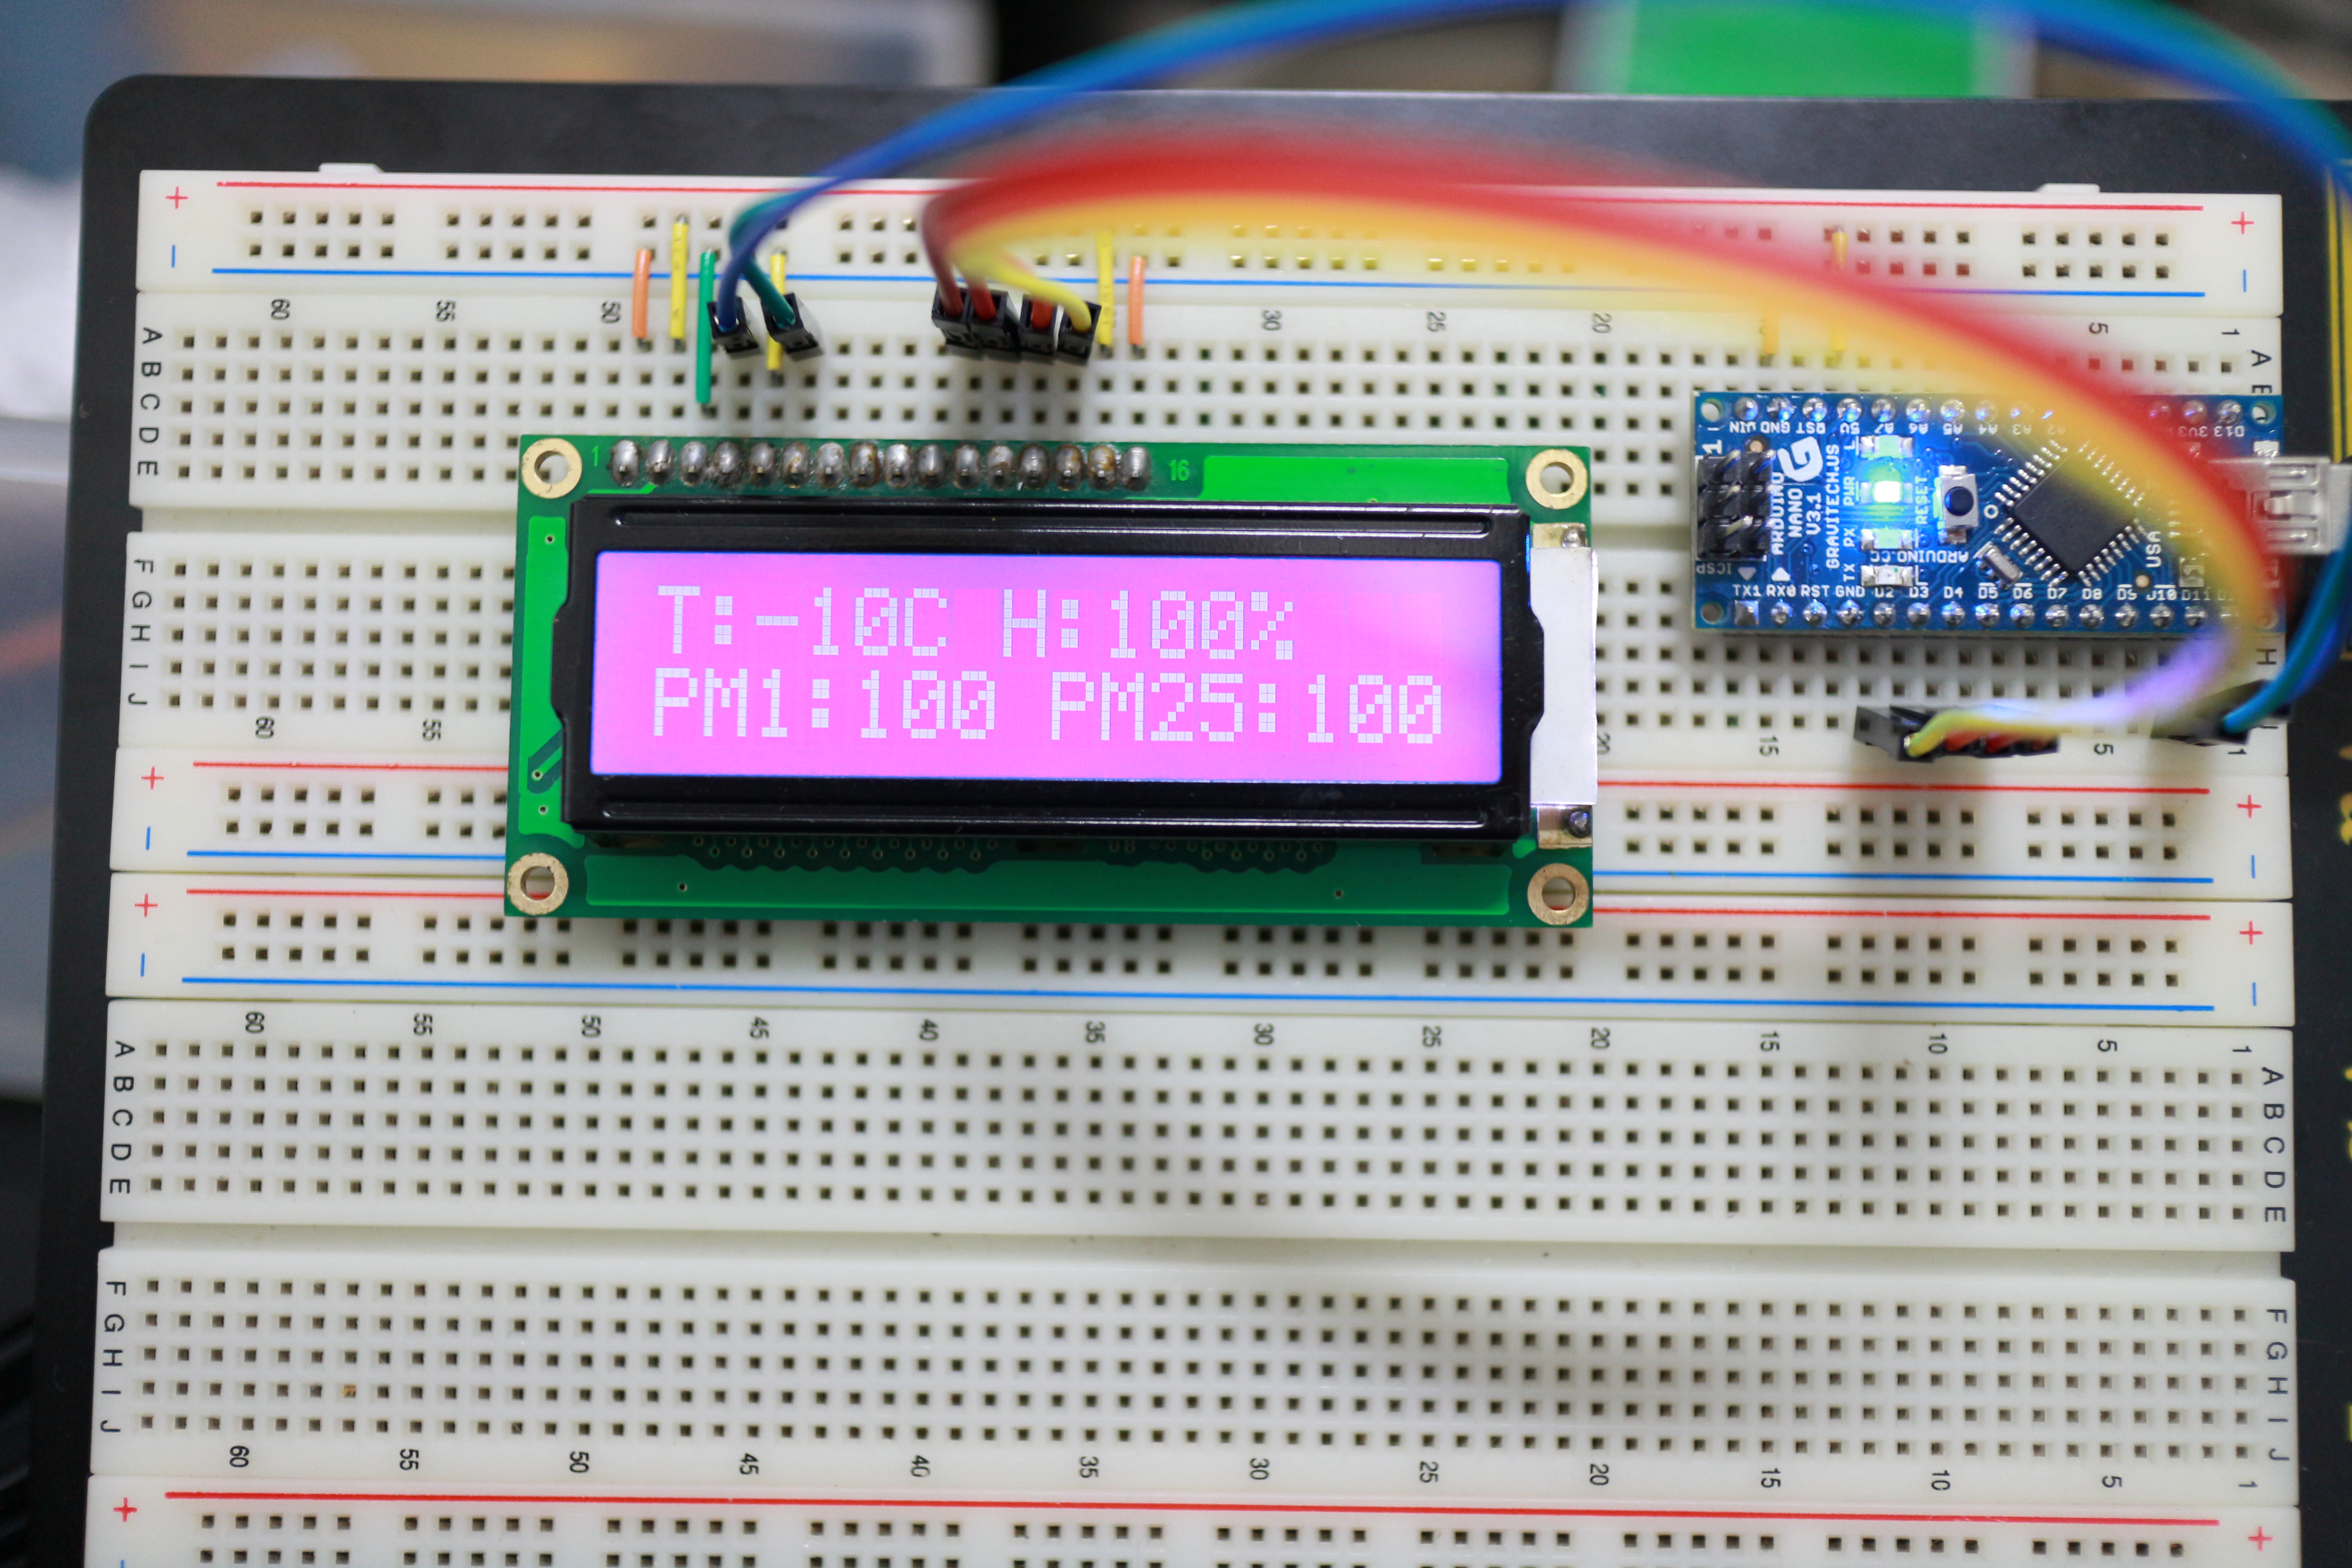
// lcd.setCursor(0, 0);
// lcd.print("T:-10C H:100% R:50% PM12");
//
// lcd.setCursor(0, 1);
// lcd.print("PM1:100 PM25:100");
}
void loop() {
char str[20];
raw = analogRead(potpin);
val = map(raw, 0, 1023, 0, 180);
sprintf(str, "%4d %3d", raw, val);
lcd.setCursor(0, 0);
lcd.print(str);
myservo.write(val); // sets the servo position according to the scaled value
delay(15);
}
#include <LiquidCrystal.h>

// initialize the library with the numbers of the interface pins
LiquidCrystal lcd(12, 11, 5, 4, 3, 2);
int potpin = 0;
int val;

void setup() {
  // set up the LCD's number of columns and rows:
  lcd.begin(16, 2);
  // Print a message to the LCD.
  lcd.leftToRight();
}

void loop() {
  char str[20];
  val = analogRead(potpin);
//  val = map(val, 0, 1023, 0, 180);
  sprintf(str, "%5d", val);

  lcd.setCursor(0, 0);
  lcd.print(str);
}
와... 이렇게 편하게 하는데 예전에는 왜 일일이 라이브러리를 만들려고 개고생을 했던 걸까?
일단 CLCD는 16x2 라서 생각외로 출력가능한 메시지가 길지가 않아서 아쉽네
하드웨어 구성은 가변 저항쪽에 0 V를 인가하면 가장 어둡게 표현되는 듯?
(그러니까 저항으로 최대치를 하면 어두워 지는 식으로 0 Voltage로 설정되는 것으로 보임)
화이트 밸런스가 하늘로 날아가면서 액정 배경이 붉은색으로 나왔으나 실제로는 파란색에 가까움
1번 핀 부터(좌->우)
GND / VCC / 밝기(GND=MAX) / RS / RW(GND) / E + 데이터(4비트 혹은 8비트)
#include <LiquidCrystal.h>

// initialize the library with the numbers of the interface pins
LiquidCrystal lcd(12, 11, 5, 4, 3, 2);

void setup() {
  // set up the LCD's number of columns and rows:
  lcd.begin(16, 2);
  // Print a message to the LCD.
  lcd.leftToRight();

  lcd.setCursor(0, 0);
  lcd.print("T:-10C H:100% R:50% PM12");

  lcd.setCursor(0, 1);
  lcd.print("PM1:100 PM25:100");
}

void loop() {
  // set the cursor to column 0, line 1
  // (note: line 1 is the second row, since counting begins with 0):
  lcd.setCursor(0, 1);
  // print the number of seconds since reset:
  delay(500);
  lcd.scrollDisplayLeft();
  //  lcd.print(millis() / 1000);
}
Reads the value from the specified analog pin. The Arduino board contains a 6 channel (7 channels on MKR boards, 8 on the Mini and Nano, 16 on the Mega), 10-bit analog to digital converter. This means that it will map input voltages between 0 and 5 volts into integer values between 0 and 1023. This yields a resolution between readings of: 5 volts / 1024 units or, .0049 volts (4.9 mV) per unit. The input range and resolution can be changed using analogReference().
It takes about 100 microseconds (0.0001 s) to read an analog input, so the maximum reading rate is about 10,000 times a second.
Can I build a commercial product based on Arduino?
Yes, with the following conditions:
Physically embedding an Arduino board inside a commercial product does not require you to disclose or open-source any information about its design.
Deriving the design of a commercial product from the Eagle files for an Arduino board requires you to release the modified files under the same Creative Commons Attribution Share-Alike license. You may manufacture and sell the resulting product.
Using the Arduino core and libraries for the firmware of a commercial product does not require you to release the source code for the firmware. The LGPL does, however, require you to make available object files that allow for the relinking of the firmware against updated versions of the Arduino core and libraries. Any modifications to the core and libraries must be released under the LGPL.
The source code for the Arduino environment is covered by the GPL, which requires any modifications to be open-sourced under the same license. It does not prevent the sale of derivative software or its inclusion in commercial products.
In all cases, the exact requirements are determined by the applicable license. Additionally, see the previous question for information about the use of the name “Arduino”.