왜 안되나 했더니.. 다른 칩에서 계속 pull down 하고 있어서 버튼을 눌러도 올라가지 않았던...
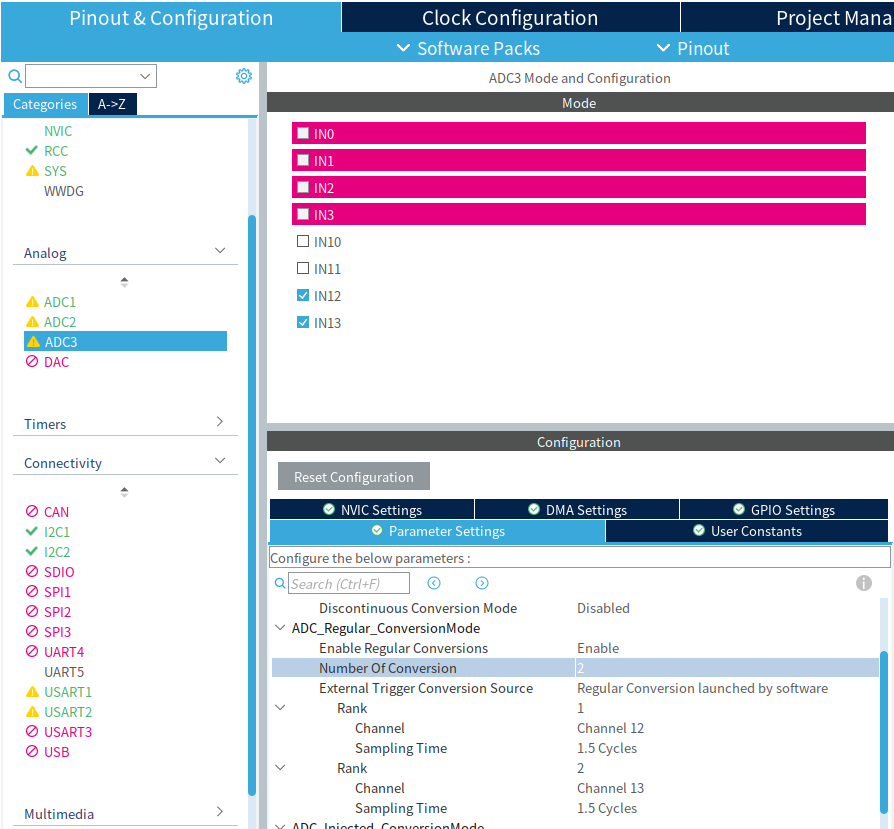
cubeide 에서 특정 핀을 GPIO_EXT로 설정하고

External Interrupt Mode with ... 로 시작하는 녀석을 고른다.
필요하다면 falling edge 혹은 rising edge에서만도 잡을 수 있는데

둘 다 해두면 어떤 이벤트에서 인터럽트가 발생하는지 모르니, 결국에는 인터럽트 핸들러에서
해당 핀의 상태를 읽어서 판별을 해야하나? 조금 복잡한 문제가 발생할 듯 하다.
[링크 : https://blog.naver.com/micomcore/223281042436?]
그리고 NVIC 탭에서 해당 인터럽트를 활성화 해준다.

아래의 _weak 함수를 재정의 해서 사용하면 끝
GPIO_Pin은 핀 번호 별로 올라오니, 다른 포트의 같은 핀은 구분이 되지 않으니 유의
| void HAL_GPIO_EXTI_Callback(uint16_t GPIO_Pin) { printf("GPIO_Pin[%d]\n", GPIO_Pin); } |
'embeded > Cortex-M3 STM' 카테고리의 다른 글
| STM32 timer 사용하기 (0) | 2024.12.13 |
|---|---|
| STM32 PWM 으로 LED 점진적으로 깜박이기 (0) | 2024.12.13 |
| stm32f103 adc + dma (0) | 2024.11.04 |
| stm32 adc 읽기(1개로 여러 개 채널) (0) | 2024.10.30 |
| stm32 tim output compare(OC) mode (0) | 2024.07.12 |